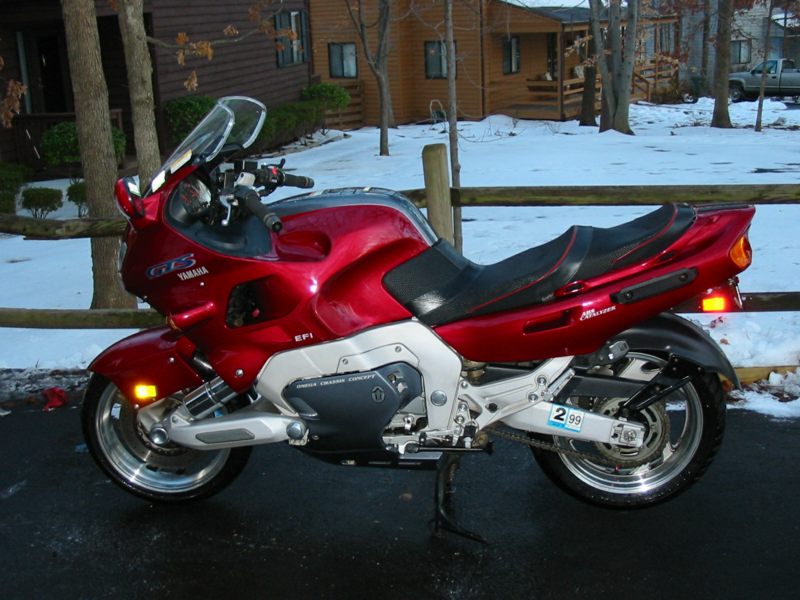
The GTS1000 (that's a motorcycle to you uninitiated) came with very expensive,
plastic-framed yet single-use air filters. Silliness. Pure silliness.
Various members of the GTS1000 mailing list had been converting their
air filters to washable/reusable filters. 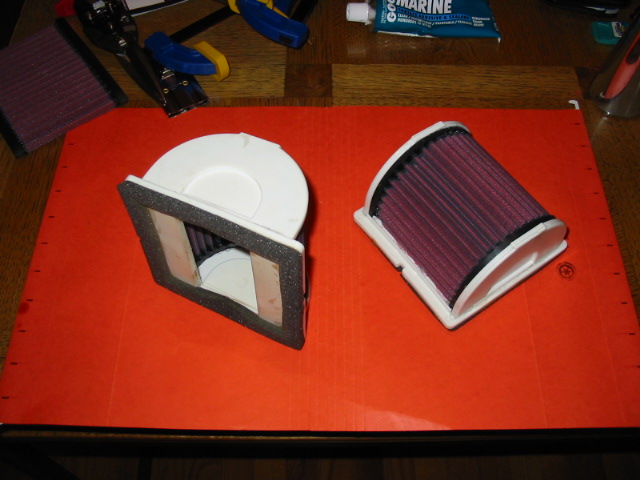 What
follows are explicit instructions on how to do so. Another
page exists that describes the procedure, but is in Japanese and uses
a different starting filter.
What
follows are explicit instructions on how to do so. Another
page exists that describes the procedure, but is in Japanese and uses
a different starting filter.
All pics on this page can be expanded by clicking. Thanks to the GTS owners mailing list for identifying the correct K&N filter to use for this job.
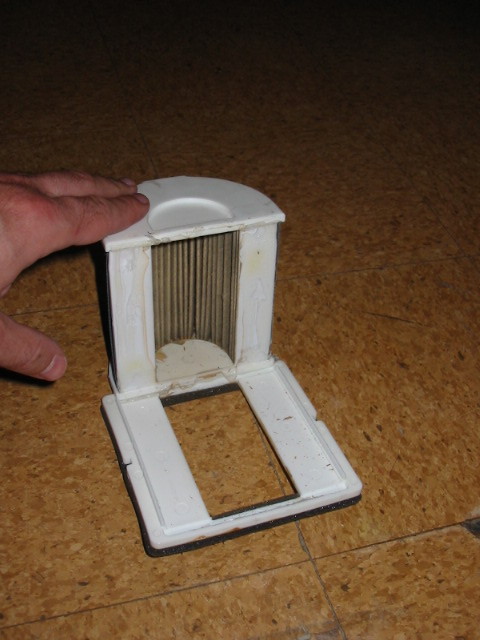
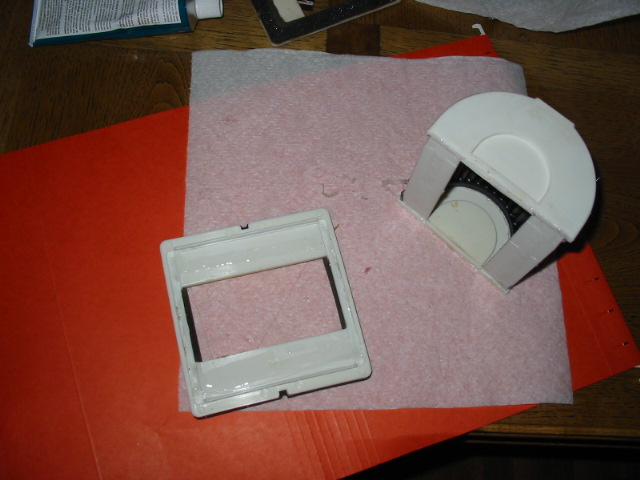
Following the instructions in your service manual, remove the air filters from your GTS (pic at lower left is with the filters removed).
These are the materials that I used:
- $65 YA-1098 air filter from K&N
- $3 tube of Marine sealant/adhesive from Goop
Tools I used:
- Flathead screwdriver
- Two 6" clamps
- Razor blade
- Metal snips (not necessary)
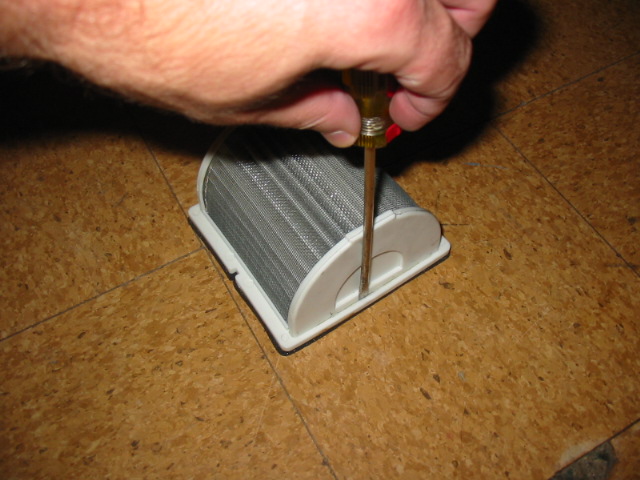
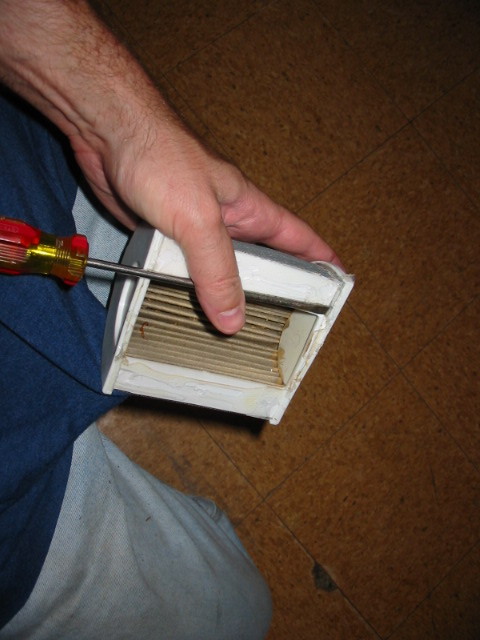
Using the flathead screwdriver, work along one end of the air filter and break the adhesive seam. The adhesive is the consistency of silicone, not hard like epoxy.
Now get the tip of the screwdriver under the edge and pry up.
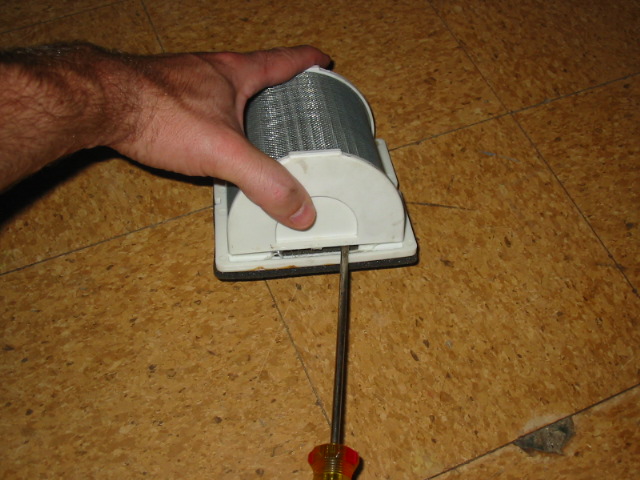
With a little effort, the base will peel away, leaving the filter material with two plastic ends and a thin plastic bottom attached.
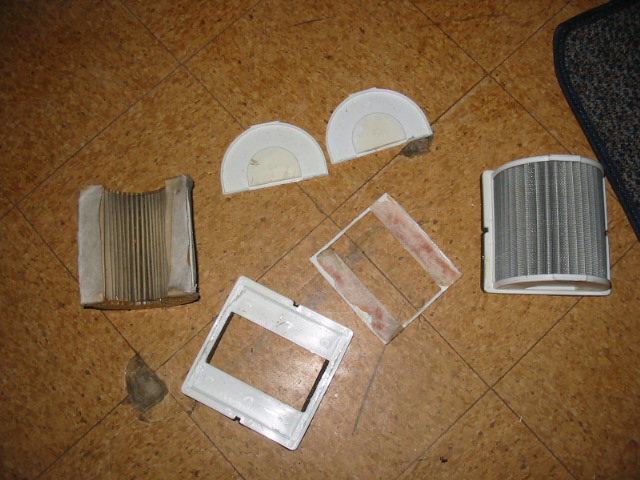
Clean the base of old adhesive, and set aside.
Getting the ends and bottom piece off the old filter material requires a tad more force. I removed the ends by bracing the screwdriver against my rock-hard abs (hey, I can dream) with the tip of the screwdriver under the edge of the end piece. Then I just pulled the filter assembly hard toward me, and the end popped right off. It worked consistently four times, and is less likely to crack the frame than prying.
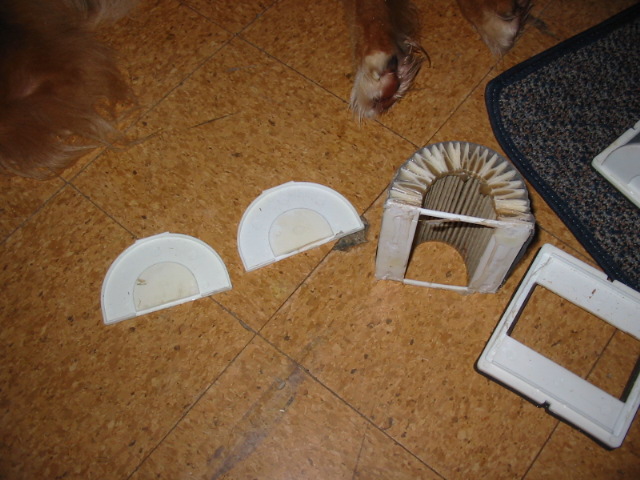
You now have the two ends, and the filter material with the thin plastic bottom piece still attached (middle).
The thin bottom piece you just have to get brutal with. Using fingers
or the razor blade, tear the filter material away. (bottom) Use the razor
blade afterwards to scrape off the adhesive and paper.
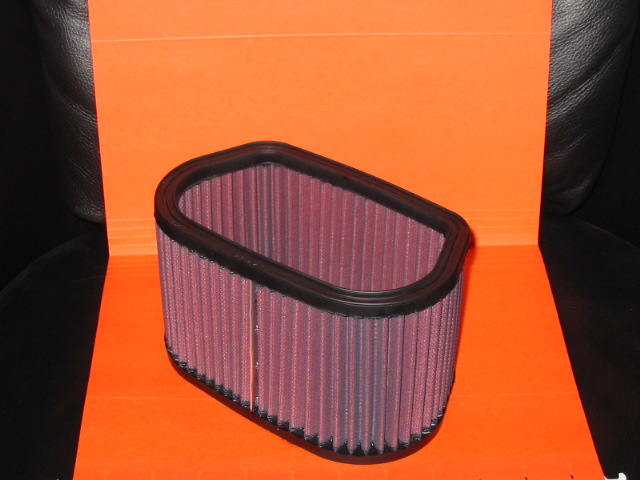
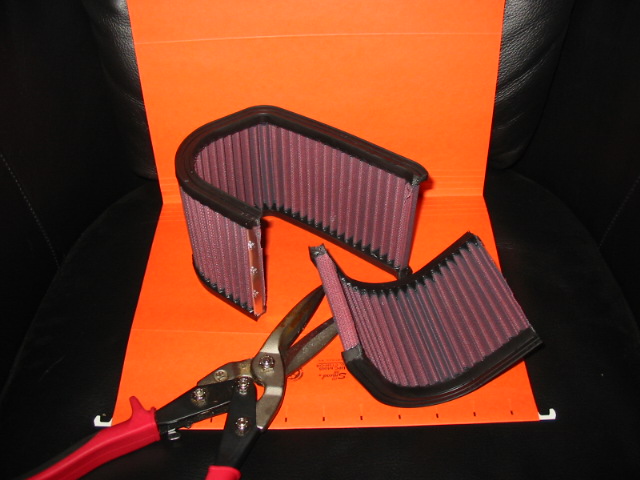
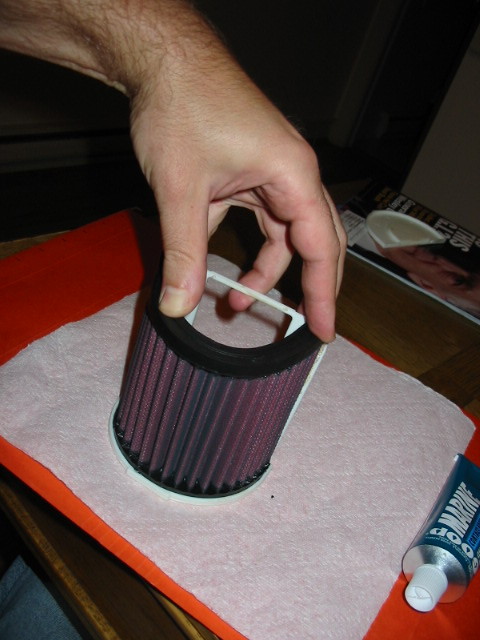
Now comes the scary part. You have to cut up your new K&N filter. The YA-1098 is almost exactly the right width for the GTS frame, so what you are doing here is cutting it to length.
Begin by making your first cut across the filter right beside the metal clip that joins the filter into a continuous loop (visible in the top pic). I used metal shears, but a razor blade works fine. Cut right along the bottom of one of the pleats.
Press the opened air filter material into one of the plastic ends, forcing
it to conform to the curve of the plastic inside the lip. The filter has
a bend in the rubber already, but doesn't quite match the radius you need.
Just force it. Note the pleat where you need the second cut to be, and
cut across the filter a second time. I cut mine a little long, just in
case, and shortened it by a pleat or two after trial fits. Don't make
the fit too tight.
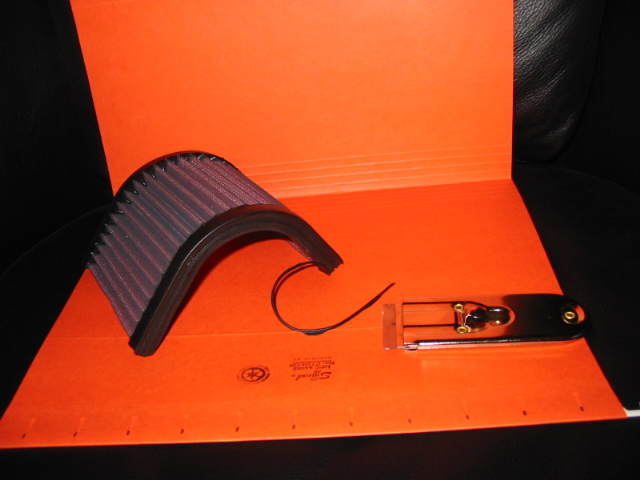
Rumor had it that the YA-1098 was exactly the right width....
but it's just a tad wide. Fortunately there are a pair of "ridges"
in the rubber on either side of the filter. I shaved these off with a
razor blade and then it was the right size. Square up the rubber
ends if necessary.
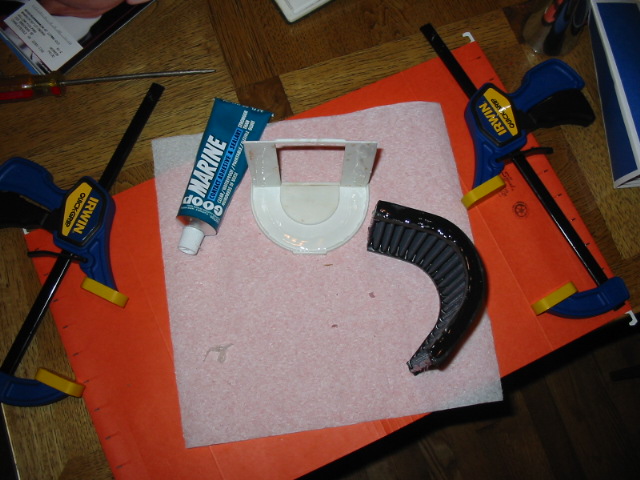
Crack open your tube of Goop® Marine sealant/contact adhesive.
Put the plastic bottom into one of the ends. It only goes one way, and there is no need to glue them together.
Put a thin layer of adhesive on the inside of the plastic end, across the plastic base, across the cut edges of filter material and along ONE rubber end of the filter. Let the glue set for 2-5 minutes.
Bend the two plastic pieces apart slightly (opening the "L"),
and press the filter material onto the bottom piece. Then force
the middle part of the filter into the curved ends. Hold the assembly
by the top unglued edge, as shown, for a few minutes.
Once it has set enough to hold its shape when you let go, apply glue
to the other plastic end and the second rubber seal. Allow them to set
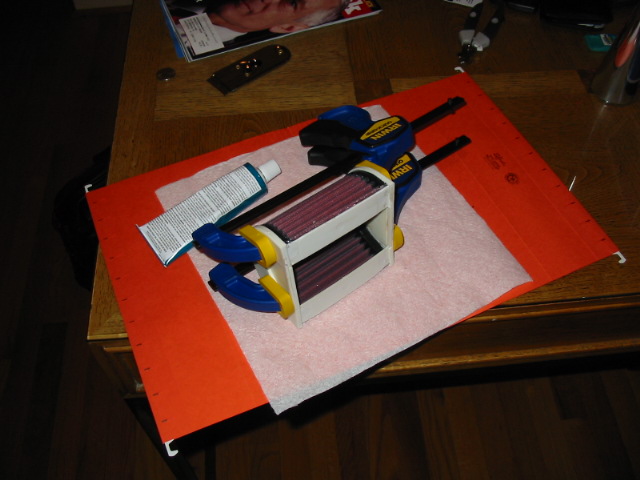
for a few minutes. Put them together, and hold it with clamps for 10-15
minutes.
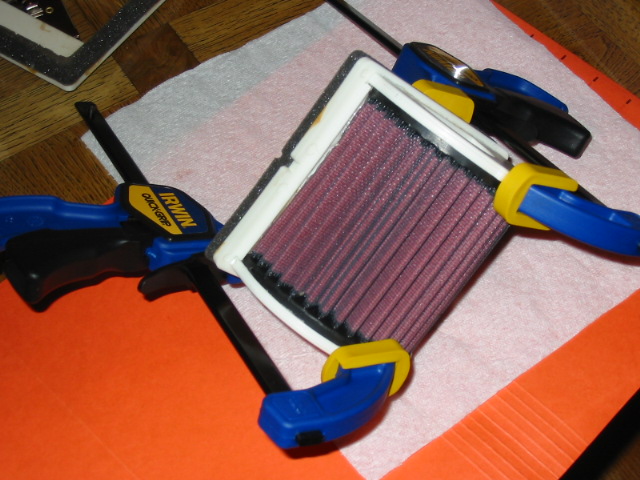
Apply glue to the upper (no foam seal) side of the base, including the
channels that the curved ends fit into, and the underside of the bottom
piece. Allow to set a few minutes, and clamp together. Make sure that
the curved ends go completely into the channels in the base. Allow to
set for half an hour.
That's it! Do the second filter just like the first using the filter material from the opposte side of the metal clip. Let the filters set for 24 hours before oiling.
Apply a coat of K&N filter oil (available at auto parts stores) from the inside of the filter.
And that's it! Enjoy!